Tag Archives: gardening

Pruning in the Winter??? Sure-Why Not!!

Mulched garden bedIt’s that time of the year for me, I get itchy to get outside. The holidays have long since passed, and we have settled into the Winter doldrums. About this time, I want to get out and get my hands dirty!  I start some seeds indoors- though I learned my lesson- there really is NO reason for me to start 280 tomato plants inside in late February-

According to the US Department of Agriculture’s hardiness zone map, we are Zone 6-A, and I always thought we were 7- see, we can learn something new every day! Though nothing is perfect, there are  pros and cons to this map- such as-that it does a fine job of delineating the garden climates of the eastern half of North America. That area is comparatively flat, so mapping is mostly a matter of drawing lines approximately parallel to the Gulf Coast every 120 miles or so as you move north. The lines tilt northeast as they approach the Eastern Seaboard. They also demarcate the special climates formed by the Great Lakes and by the Appalachian mountain ranges.-which is a good thing. With a pro there is usually a con, and here it is- In the eastern half of the country, the USDA map doesn’t account for the beneficial effect of a snow cover over perennial plants, the regularity or absence of freeze-thaw cycles, or soil drainage during cold periods. And in the rest of the country (west of the 100th meridian, which runs roughly through the middle of North and South Dakota and down through Texas west of Laredo), the USDA map fails. So as with anything, you have to use your best judgement.

Here are a few things that you can do to start getting things ready for Spring!

Get your tools ready! Clean them up-wash them with a light abrasive sponge and get all the remaining dirt off of them, dry them and lightly oil them up. Sharpen any cutting tools that you have so that cuts are clean and easy.  (of course, you did this already this Fall when you put them away)

Prune trees and shrubs, both ornamentals and fruit

Check flower beds for plants that may have heaved

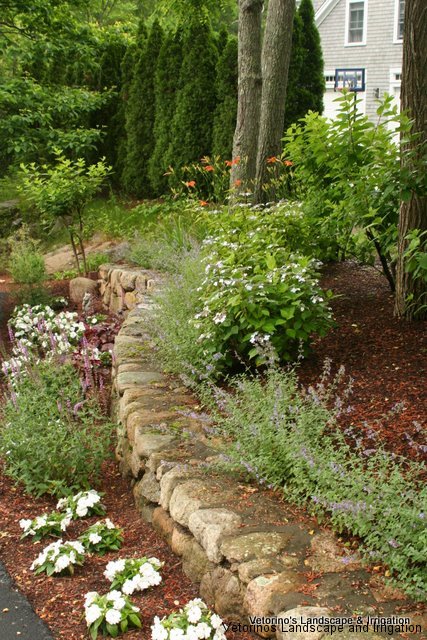
Fluff up the mulch in your beds, and if you have some on hand, replace as needed

Check outside plants and trees for animal damage

Cut some branches for forcing indoors-I like Forsythia- to me that says that Spring can’t be far away

Rejuvenate holly bushes with a hard pruning

Cut back your ornamental grasses-I find that tying them makes it easier

Check evergreens for sign of desiccation (drying out) – hope you had us come out and spray them with an Anti-desiccant this past Fall-

Start seeds of cool season vegetables and flowers

This is also a good time to check your houseplants for any pests and finish up your catalog seed and plant orders-I say- get out there and get those hands dirty!!

If you have any questions or comments, we welcome you to post them in the comment box below-

 
[facebook]

Share this:
Share

Starting Your Garden Seeds Indoors….

seed traysI’m in hibernation mode with visions of seedlings dancing in my head.

The fact that I start receiving all kinds of catalogs with gorgeous flowers and healthy vegetables only encourages me. Thus begins my planning for the coming seasons’ garden. I start to get itchy to have my hands in the dirt, so I begin getting my “fixins” together and find things that work to start my seedlings. (I now know what to do with all of those laundry detergent caps that I save-you know- because someday I may buy one with out the cap-or it may get lost in the “land of the lost left socks” so it makes sense to have a million of them on hand-)They can make a great vessel for starting seeds-another great idea for seed starting (compliments of my boss’ wife) are the pods from your K-cups. I begin my list of what I would like to plant, then pare it down to what is reasonable. I learned that lesson after planting 280 tomato seeds one year-good thing I had access to a LOT pots and plenty of friends wanting them.  I always tend to have “garden grandeur” and think that I should have more plants than is wise for me because honestly, come July, I’m more interested in sailing than weeding. I received a schedule for indoor seed starting and thought it would be a good thing to share, compliments of one of my favorite catalogs: John Scheepers Kitchen Garden.

Here is the general Seed-Starting Schedule for seeds that should be started eight weeks before the last expected spring frost date.

Eight-week General Seed-Starting Timetable
Horticultural Zones 9 & 10: Start seeds indoors in early to mid January.
Horticultural Zone 8: Start seeds indoors in early February.
Horticultural Zone 7: Start seeds indoors in mid February.
Horticultural Zone 6: Start seeds indoors in late February.
Horticultural Zone 5: Start seeds indoors in early March.
Horticultural Zones 1-4: Start seeds indoors in mid to late March.

Here is the Seed-Starting Schedule for vegetables, herbs and flowers that require more or less time prior to transplanting out into the garden.

More-or-Less-Than-Eight Weeks Seed-Starting Timetable

Four Weeks: Melons, Bitter Melon and Cucuzzi Edible Gourds.
Six Weeks: Asparagus, Fennel, Onions, Rhubarb, Shallots, Tomatillos, Basil, Echinacea Root and St. John’s Wort.
Eight Weeks: Eggplant, Tomatoes, Chiles, Sweet and Bell Peppers, Chives, Sage, Stevia and Thyme.
Nine Weeks: Broccoli, Cabbage and Kohlrabi (transplant out four weeks before the last frost date).
Ten Weeks: Celery, Celeriac, Jicama and Lemongrass.
Eleven Weeks: Leeks, Artichokes and Cauliflower (transplant out four weeks before the last frost date).
Twelve Weeks: Cardoons and Brussels Sprouts.
Sixteen Weeks: Strawberries (for first year crop) and Rosemary.

Flower Seed-Starting Timetable

Five Weeks: Alyssum.
Six Weeks: Balsam, Cutting Ageratum, China Asters, Celosia, Cleome, Coleus, Catmint Nepeta, Echinacea, Euphorbia, Forget-Me-Nots, Dahlia, Nicotiana, Scabiosa, Snapdragons, Stock and Thunbergia.
Eight Weeks: Baby’s Breath, Black-Eyed Susans, Milkweed, Coreopsis, Gaillardia, Globe Amaranth, Helichrysum, Hibiscus, Hollyhock, Heuchera, Nigella, Phlox, Platycodon, Statice and Yarrow.
Ten Weeks: Dianthus, Digitalis, Lobelia and Heliotrope.
Twelve Weeks: Datura, Salvia, Verbena and Viola.

I hope that you found this helpful, and would love to hear your tips, questions, and comments below-

Happy Gardening!!

Seedling


Share this:
Share

Winter Rose Care

red roseDo you have questions about how best to protect your roses for the Winter? We suggest a few basic, easy to follow steps to help yours make it through the tough Winter months.

  1. Water well. A well hydrated plant can survive winter better than one that is dry and stressed.
  2.  Put a couple of shovelfulls of compost over the crown of the rose plant.
  3. Give your rose some non-nitrogen fertilizer. Late fall, after a hard freeze, is a good time to give your rose a dose of Epsom salts (about 1/2 cup per plant), along with rock phosphate (don’t use bonemeal — it attracts rodents) and maybe a little potash. These fertilizers won’t promote new growth on the canes, which can be hurt by frosts and winter. Instead, they will help promote root growth, which can continue well into December if the ground is mulched. And, they’ll have a chance to work into the soil through freeze/thaw actions and be ready for your plants to use in the spring.Composted rose at crown
We suggest that you trim them in the Fall, so that the wind doesn’t cause them to rock, which can be detrimental to the health of your plant. When they are dormant, in the late Winter/early Spring hard prune your roses. Roses are shrubs that benefit from a hard pruning.  The pruning causes the plants to sprout new, healthy growth. Many roses only bloom on new wood, hybrid teas included. For luscious flowers during the summer, make some time for pruning rose bushes. After all, it seems that many of us are happiest when we are working in our gardens, so why not incorporate some Winter gardening as well.
[facebook]
Share this:
Share

Fall bulb planting=beautiful Spring color

snowdropsNow is the time    to get those Spring flowering bulbs in the ground to have beautiful bursts of color after a long cold Winter.  It’s really quite simple to do and the payoff can be big big color!  As with any garden planting you do, proper soil conditions and amendments are key. I love seeing the big, bold, beautiful Daffodils- to me that’s a sure sign that the weather I love will be here soon!  So, here are the steps to take to have a beautiful re-awakening after a dreary Winter:

  1. Choose healthy bulbs. Avoid bulbs that are dry and withered, spongy or moldy. In general, the larger the bulb for its type, the more flowers.
  2. Choose an appropriate location. Most flowering bulbs prefer full sun, but that can be almost anywhere in the spring, before the trees leaf out. So don’t overlook a spot that seems perfect, just because it’s a bit shady in the fall. Woodland bulbs; Woodland Anemone, Jack-in-the-Pulpit, Dog’s Tooth Violets, and Snowdrops prefer a bit of cool shade.
  3. A well-drained soil will prevent the bulbs from rotting in cool weather. (This is usually my biggest mistake)
  4. In areas such as ours, with cold winters, you can plant bulbs as long as the soil is soft enough to dig a hole, the sooner you plant, the longer they have to start growing their roots before the ground freezes.
  5. Plant with the pointed side up. The pointed end is the stem. You may even be able to see some shriveled roots on the flatter side. If you really can’t tell, don’t worry about it. The stem will find it’s own way, sooner or later.
  6. Plant bulbs to a depth of about 3 times their diameter. For Daffodils, that’s about 6 – 8 inches. Smaller bulbs can be planted to a depth of 3-4 inches and so on.
  7. Mix some bone meal into the soil at the bottom of the hole at planting time, to encourage strong root growth. You could mix in some water soluble fertilizer as well, but it’s not necessary if you’ve already amended your soil.
  8. If rodents tend to eat your bulbs, you can try sprinkling some red pepper in the planting hole. A more secure method is to plant your bulbs in a cage made of hardware cloth and cover with chicken wire if you have dogs that dig. The roots and stems grow through, but the rodents can’t get to the bulbs. Make it easy on yourself and make a cage large enough to plant at least a dozen bulbs. Or you can make it really easy on yourself and stick to daffodils, which rodents and most other animals avoid.
  9. Replace the soil on top of the bulbs. Water the bulbs after planting, to help them settle in and close any air pockets. Through the fall and winter, you only need to worry about watering your bulbs if you’re having a particularly dry season.        So, go forth, plant your bulbs and enjoy!    and as always….we welcome your questions and comments~
    King Alfred Daffodils
[facebook]
Share this:
Share